by Steve Sciandra
Development Engineer, 3D Systems Geomagic
Hi.
It has admittedly been a while since we posted here, mostly because Richard Sandham has barricaded himself into a script development dungeon, from which he only appears when someone utters,"Bagels in the kitchen." With that in mind I was asked to fill in for a blog or two.
What to write about?
GeoAutomate of course.
Across the last few months I have heard about this tool in hallways around the aforementioned dungeon but never got quite to the point of trying it out. So let's see how we fare jumping right in to Richard's flying circus.
GeoAutomate
GeoAutomate 2012 SR1 is an automation utility for Geomagic 2012 industrial software. It watches a directory for new input files. When one is found (created/copied/moved into the Input Directory), it will launch the selected Geomagic 2012 industrial application and process the data with the designated Process Script.
You can download GeoAutomate from the Labs page on the Geomagic website.
To get started I follow the install instructions and quickly have a Geoautomate.exe on my machine in a folder called something like c:\Geoautomate201 and other folders I created as well.
Executing the .exe, I see a nice-looking user interface that lets me define folders where I can:
- Drop in a file to trigger off a process
- Store scripts that define the process
- Create output files and any other artifacts of the process run
What to Automate?
Lately, here at Geomagic we've been doing our share of 3D printing: printing physical models of the 3D models designed in applications such as Geomagic Studio, Geomagic Spark, etc. Geomagic has been using 3D printers routinely as a complement to our software.
The process we go through to get a physical model in our hands is a manual one that includes the following steps:
1) Process a model in Geomagic Studio or another or our software
2) Save out the model as a .stl file
3) Launch the printer software to get the .stl model ready for printing
4) Save the file to a flash drive and walk it over (or copy over network) to the 3D printer
5) Navigate the 3D printer menu to print the model.
What if?
What if we could simply drop a Geomagic Studio-processed model into a directory and moments later the printer starts chugging away, skipping the manual steps 2 thru 5.
![]()

![]()
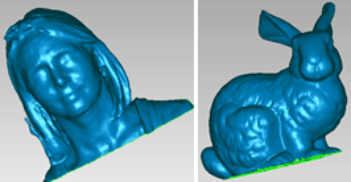
Piece parts
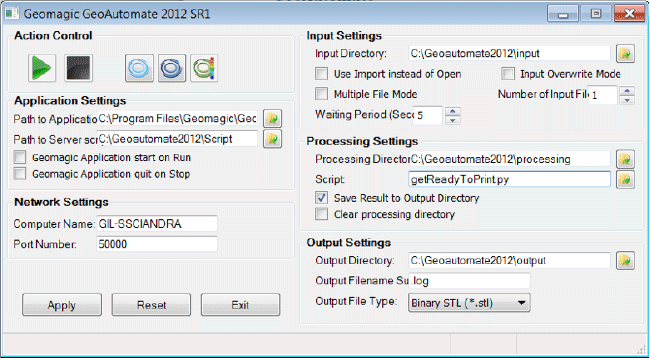
To make our automation dream come true, we need to configure the following in the GeoAutomate application:
1) A 3D model of the Stanford Rabbit and 3D scan of an employee's head (click the phrase to download the .wrp data of the bunny)
2) Script to process the head model and the rabbit model
3) Script to process the resulting 3D model and further process it, then send the ready-for-print head model to the 3D printer.
3D Models
We have the necessary .wrp files of the models we want to print from previous projects. Notably, we scanned all (well, most anyway) of the Geomagic employees' heads last year, and some of them made it onto the company's custom-printed foosball table. The world's first 3D printed company foosball team? Quite possibly. But nonetheless, read about the foosball table.
Trim Head script
Also for the foosball table project, one of our engineers wrote a short script to clean up our employee scans, trimming extra triangles and the like to make a printable bust of the employee. I thought we would yet again reuse this effort towards our goal.
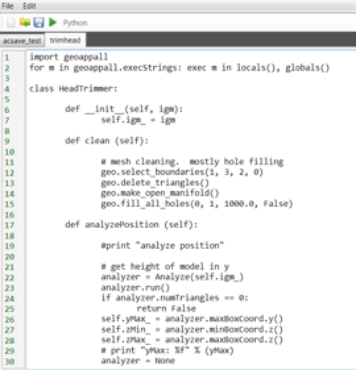
Script Results:
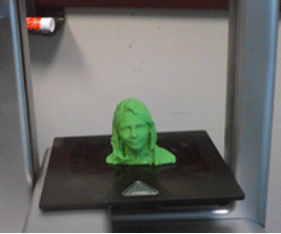
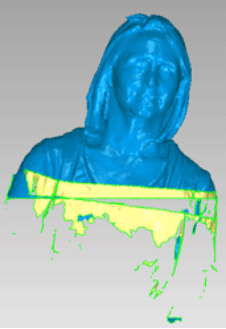
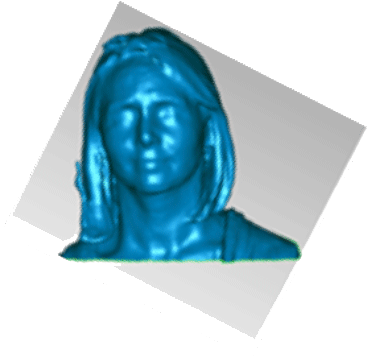
The Trim_head script cleans up the model, removing noise and cropping the model into a standard bust.
![]()
Ready-to-Print Processing
The Trim_head script also fires off a command, which converts the .stl model into the .cube format that the 3D printer understands. It is this .cube file that is sent to the printer for printing.
Configuring GeoAutomate
Below the configuration of the"pieces parts" mentioned above.
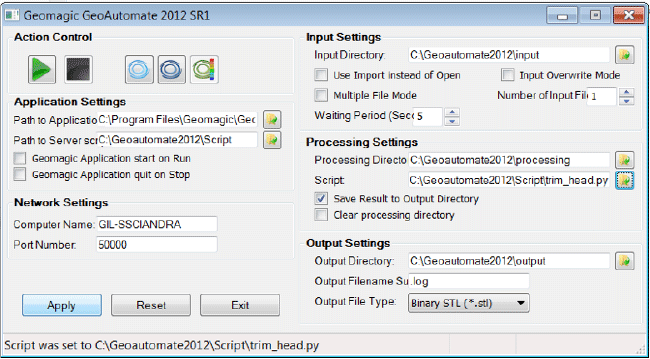
Pressing Play
When we're sure that the GeoAutomate app is talking to our Geomagic application (in our case Geomagic Studio 2012 SR1), we can press the Play button; this will start the GeoAutomate process, watching the input directory for new 3D model to process and print.
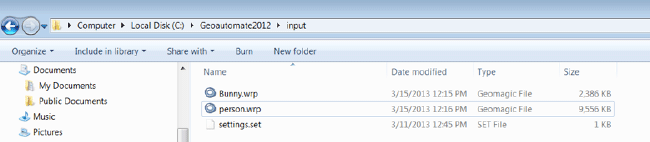
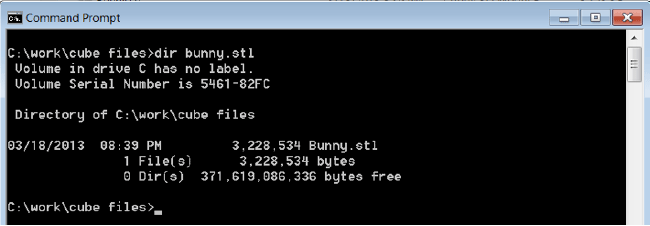
Copying a file to process
So let's copy a .wrp file into the input directory the old fashion way: via the command prompt:

Processing the file
GeoAutomate will sense a new file is in the directory and apply the processing script to it. When the processing script finishes, a resulting .stl file will be copied to the output directory. Again from the command prompt we can see:
Off-to-the-Printer' step
Some 3D printers' software has a command line interface that we can use to queue up a job to the printer. Our processing script contains printer directives to automatically print the file on the 3D printer.
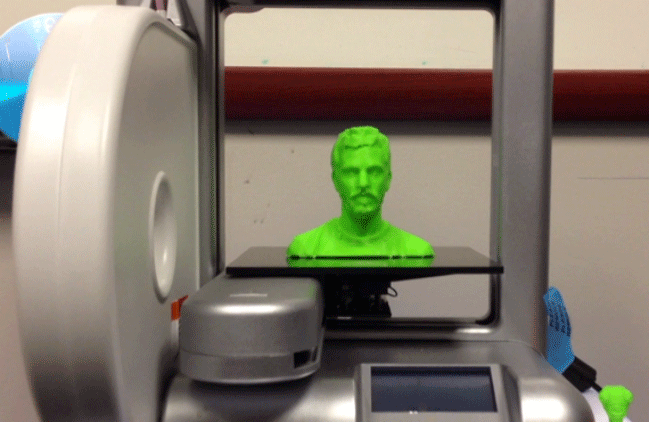
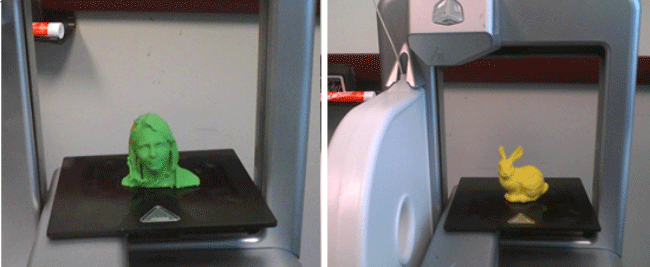
It's printing!
After the above programmatic steps, the printer starts buzzing away, printing a physical model from your 3D software model.